|
Leopard Gecko Egg Laying
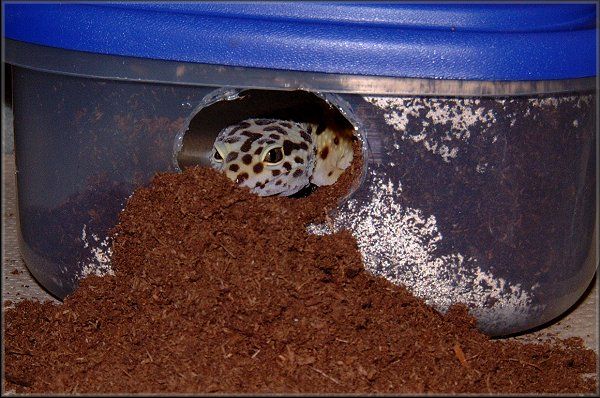
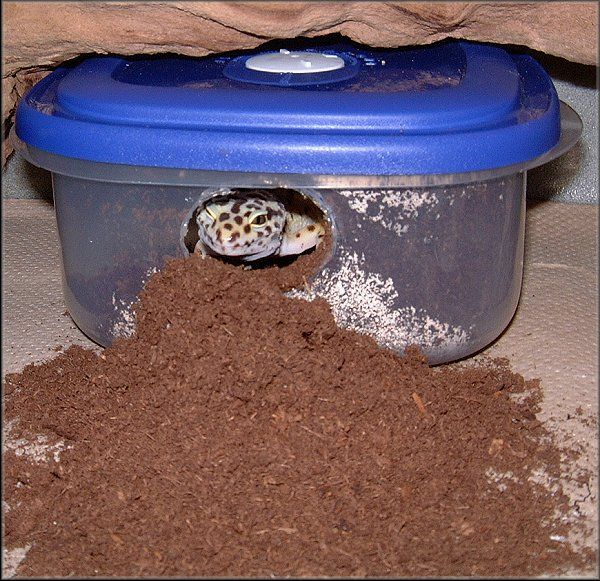
A dead giveaway that this is happening is the significant amount of peat moss that she has kicked out of the nesting box. (Note that a small amount of laying medium will initially be kicked out of the nesting box. This is a good signal that the actual act of egg-laying is not far off.)
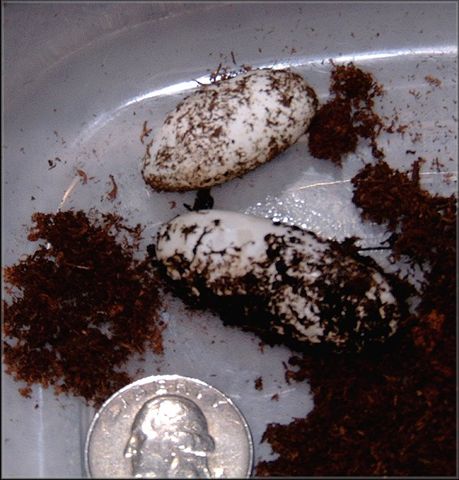
Here you can see both eggs. Two eggs is the standard size of the clutch, though it is not unusual for a first time mother to lay just one. (This was the case with Dragon's first clutch. The clutch pictured here is her second.)
Here's a closer look at the eggs:
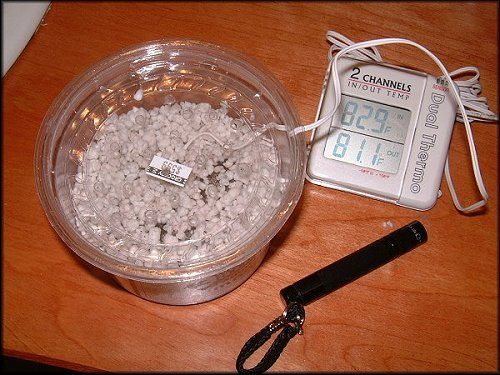
Once the eggs are laid, it is important that they be removed as soon as possible from the gecko's enclosure and placed in a prepared incubator. This is done quickly to prevent the eggs from drying out or getting chilled. This must be done with some care so as not to roll the eggs. Typically, breeders will mark the top of the egg with a soft pencil or fine line marker to indicate "which way is up" and protect the developing embryo. (Excessive rolling can literally drown the embryo.)
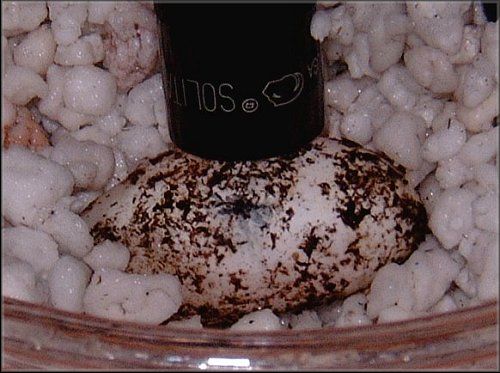
Here's a closer look at these freshly laid eggs.
Leopard Geckos Eggs - Fertile or Not?
To candle leopard gecko eggs is a simple process. A mini MAG light works
great and all you need is a room that gets dark--a bathroom or closet
will do well, or you can candle at night.
STEP 2: Turn off the room lights and move the flashlight along the side of the egg. Look for faint pink and red veins (these may appear as a swirl). If these lines are not present look for tell-tale color. Fertile eggs glow pink (more on this in the next page):
Part II. Fertile or Infertile: A Guide to Reading the Candling
Results
Gecko eggs like many reptile eggs are not hard shelled like bird eggs.
Rather they have a leathery exterior and give somewhat when handled.
However, fertile and infertile eggs can in some instances feel
distinctly different when they are picked up and examined. The infertile
egg in the photo above felt like a partially filled water bottle and was
more translucent than the fertile one which was white, firm and felt
more like a stale marshmallow.
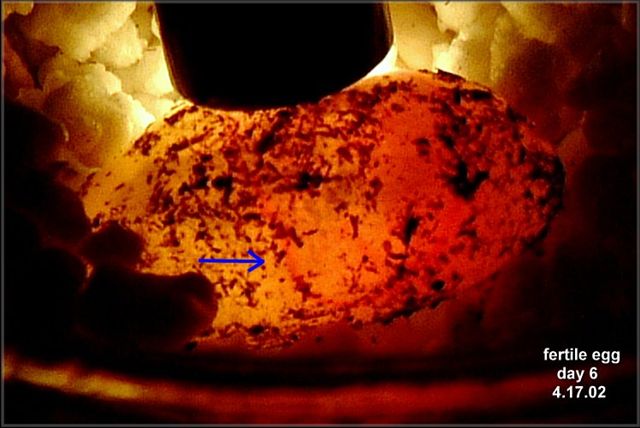
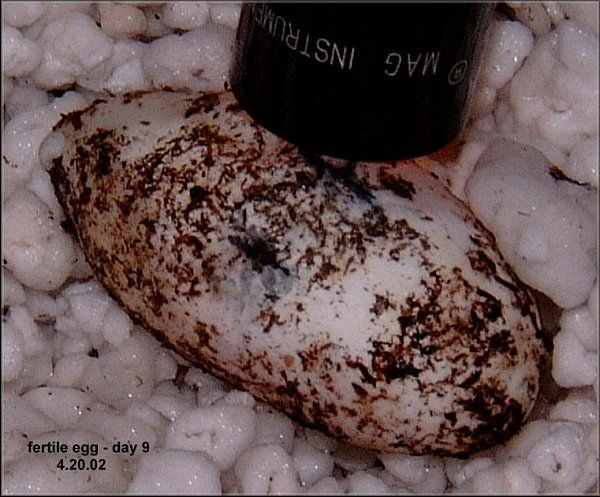
Here's a closer look at a fertile egg as it is being candled 6 days after being laid. The most obvious clues that this egg is fertile is the red orange glow. Other definitive signs include the presence of pink veins (the arrow is pointing to one tell tale red line.)
Part III. Waiting for Baby, or Candling as the Gecko Develops
Even with the room lights on, the eggs glow pink. Here is the same egg as in the photo above:
Even more dramatic is another egg laid the same day:
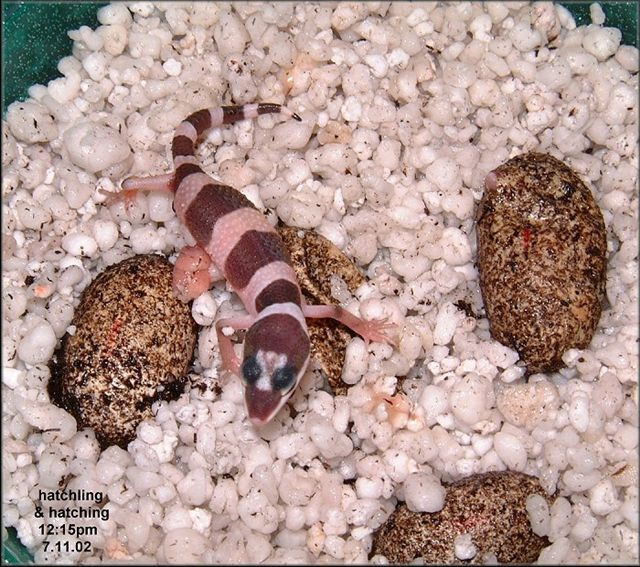
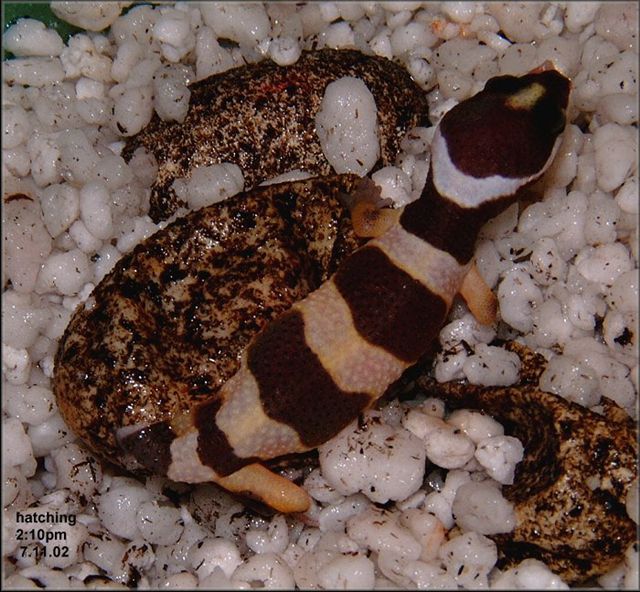
Leopard Geckos Eggs - Hatching
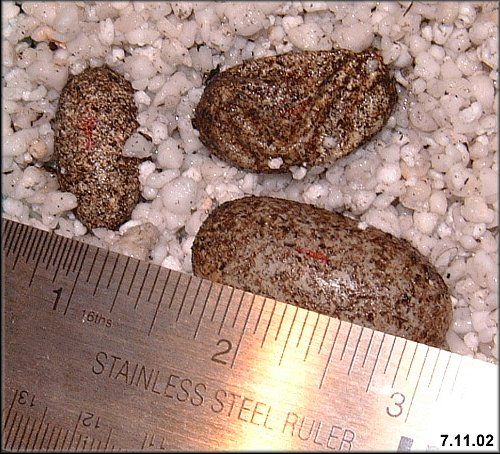
Here's another look at the size difference between the eggs that are hatching, about to hatch and one that was laid a few weeks ago. The smaller egg to the far left is the size of a freshly laid egg:
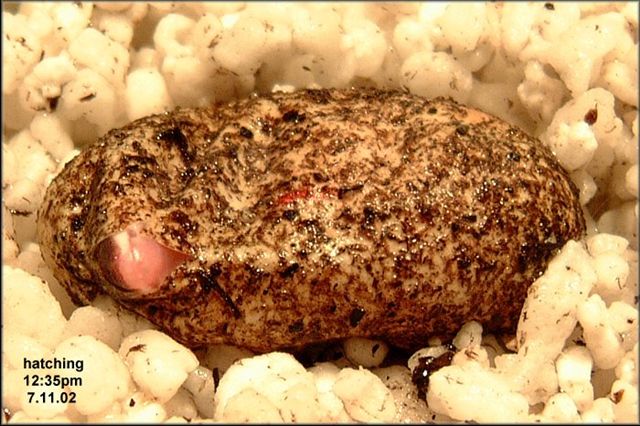
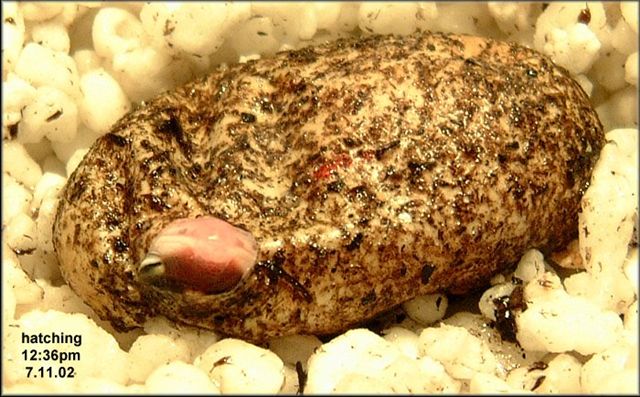
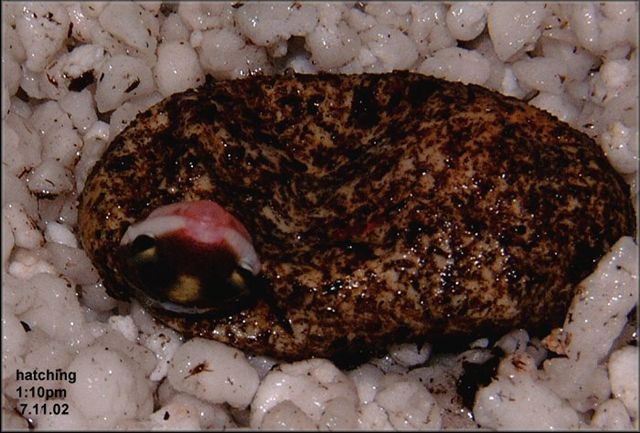
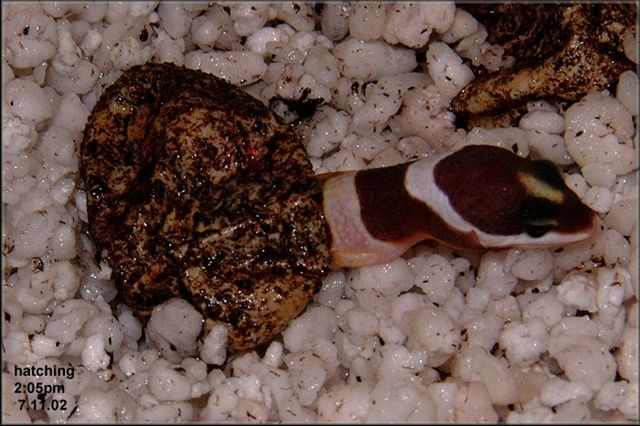
Part V: The Hatching Process (7.12.02)
3. and then gets its nose out
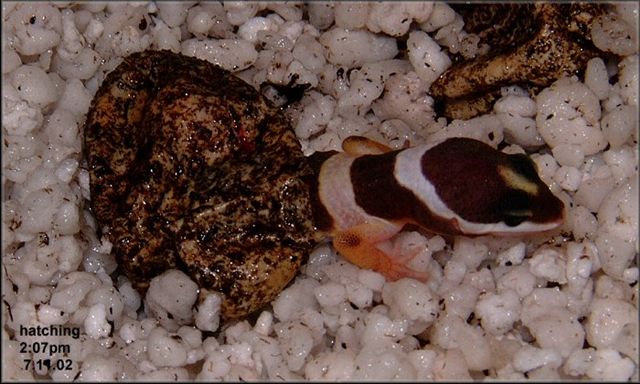
4. Then works to push its head out
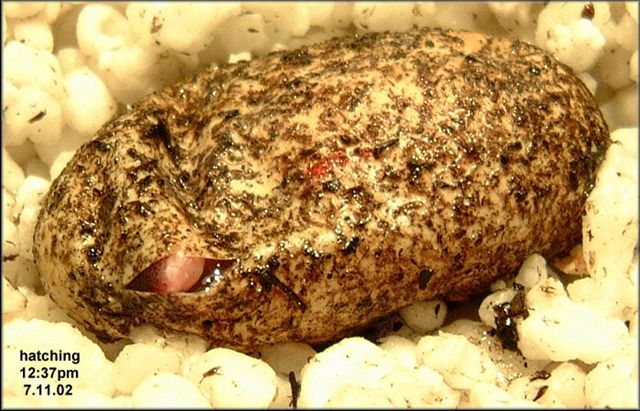
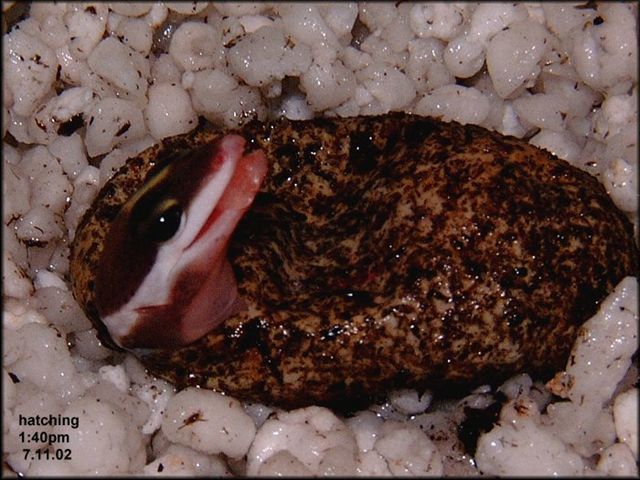
5. by rotating and pushing
6. and then retreats for a rest
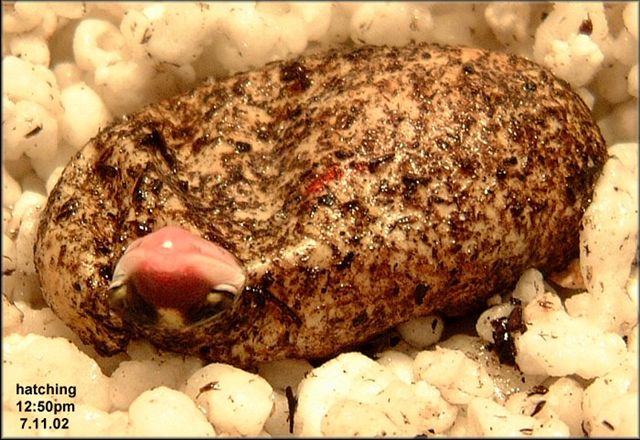
At this point the hatchling retreated briefly inside the shell
"swimming" a full circuit around the inside of the shell before
returning to the slit in the shell.
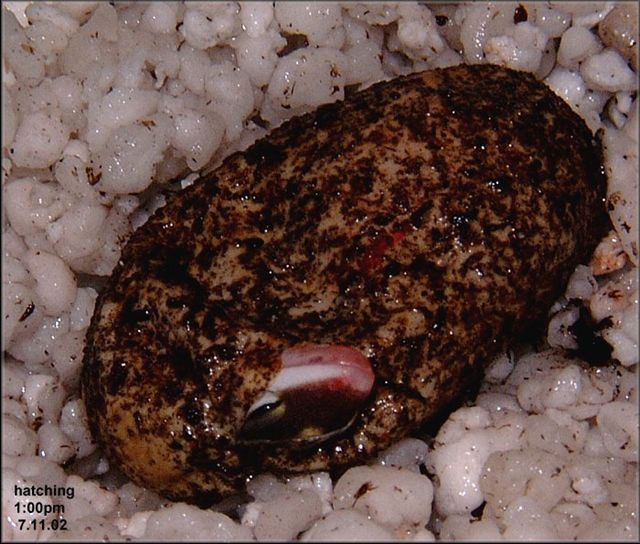
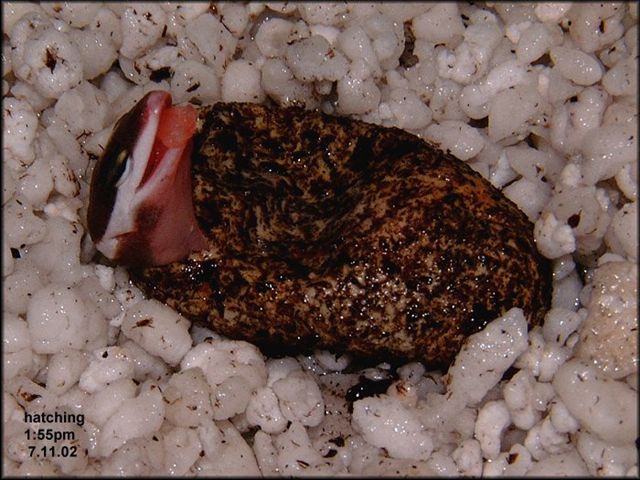
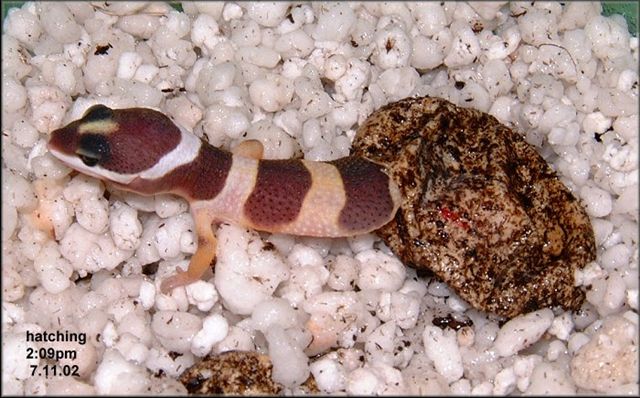
8. Hatchling having its first look at the world
9. Now pushing the rest of the head out
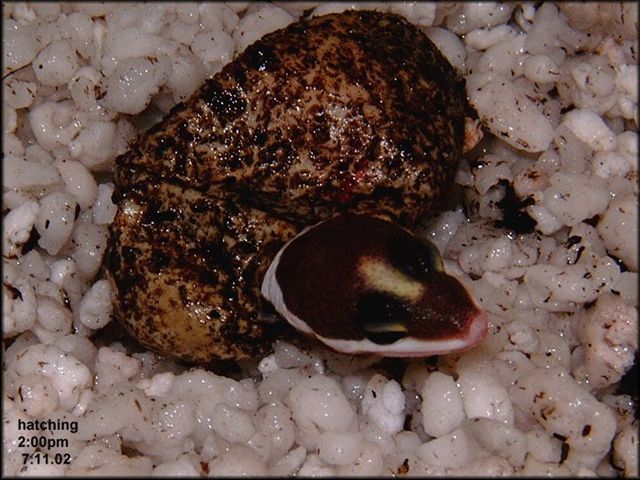
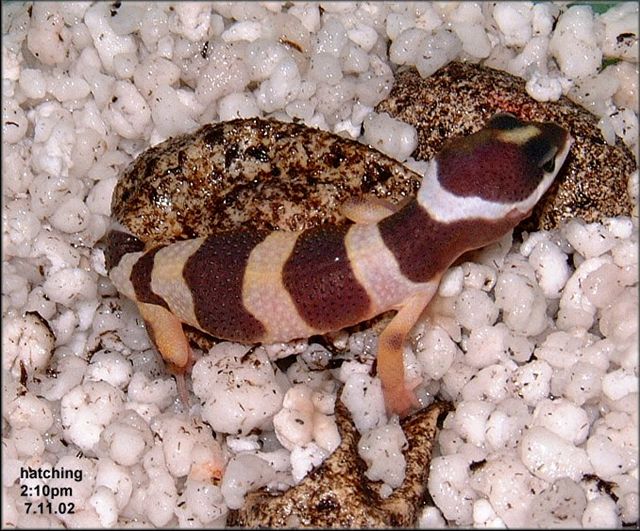
The hatchling rested and cleaned its face at this point in the hatching
process.
11. More resting
12. Another cleaning
Approximately an hour and three quarters elapsed up to this point. The
last fifteen minutes were dramatic as the hatchling completed the
process.
14. Freeing the front legs
15. It is hard work to free the torso
16. The legs are almost out...
17. Hatchling's Out!
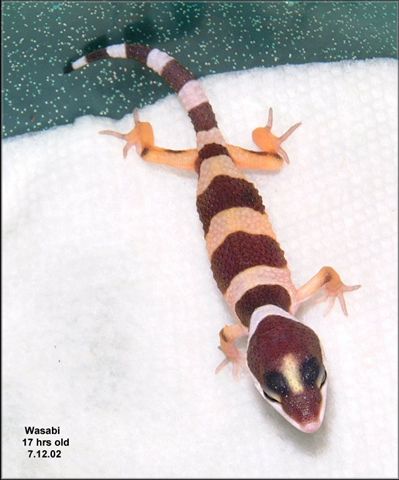
18. Another view of the new Hatchling
The whole process took just under 2 hours.
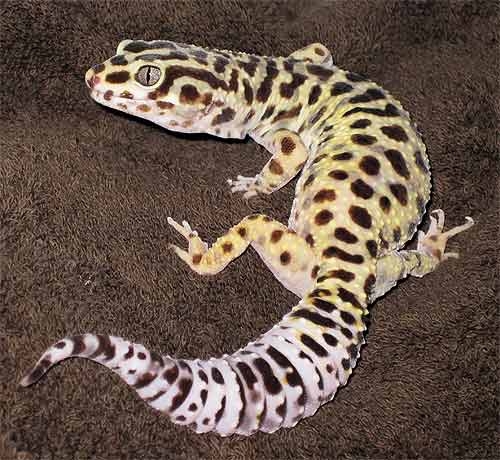
20. Updated picture of Wasabi (taken on March 8, 2009)
Visit our Leopard Gecko Care and
Breeding page. |